![]()


|
|
|
|
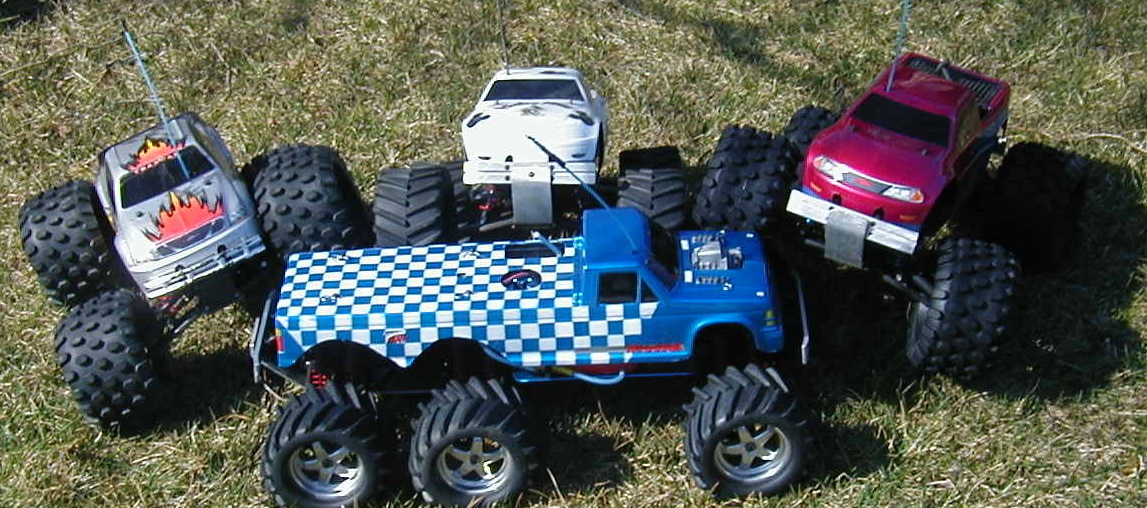
6WD Maxx
My 6WD Maxx started out by tearing apart an extra T-Maxx I have and overlooking the whole truck to find the easiest route to make it a 6WD. My first thoughts were to put another transmission and motor into the truck but that seemed much more complicated than necessary. I then was thinking I could make it like a truck with the rear axle having an input drive shaft and the rear of it having an output drive shaft. The first thing I needed to do was figure a way to make this new differential. This started by getting two new differential cases and finding the exact center of each case and the bearing. After completing that it was time to cut them. After cutting them I sanded each side to give a rough surface to be able to epoxy the halves back together. What I am trying to accomplish is to get 2 front halves of the differential together so there is an input and output side. After testing the fit and I was sure they would work I started the bonding process. I first drilled 2 wholes in each of the 4 halves. I inserted a small pin of metal in them to keep the alignment while epoxing them. I am familiar with aircraft fiberglass and epoxy so this is the route I decided to take. Mixing my own batch of resign, flox, micro balloons and fiberglass strands I epoxed my cut halves together. After they cured I I did some sanding to make sure of a good fit and installed my gears, greased and sealed the differential. The rest went very smoothly I stole the rear axle off my extra T-Maxx and removed my rear axle off the E-Maxx. I disassembled the E-Maxx axle to insert the new differential and drivelines. After installing the 2nd axle I was ready to start with the 3rd. My plan here was to add a plate to the top of the axles and a new longer skid plate to the top creating a box like frame and keeping it strong. One trick to the rear axle is you must flip the differential over in the bulkheads or the axle will want to go the opposite direction as the truck. This is due to the 3rd driveline turns the opposite way. I cut my own aluminum Skid and upper plate. ( They are crude looking but work.) Made the appropriate wholes and bends and installed them together. Next I started looking for a body I was lucky to be informed that a company called Hooters Chassis sells a stretched body for their pulling trucks. After receiving it I made the appropriate mods, painted it and I was done. TESTING THE 6WD MAXX After I completed the truck it was time to test it out. At first I had expected the turning radius to be really bad but it turns well. Next was some small bumps, curbs, steps, plants, etc. That all went well. Next was to jump it. I jumped it off a ramp in front of my house at least 30 times. All went well except for the one hit against the back of my van. I broke the body mount and bent my skid. After this I was off to the local construction site for some hill climbing. The hill climbing went well the truck never flipped over backward like it did the last time I was out there but it did heat the batteries and motors up a little more than I expected. If I was to keep the 6WD on my E I would probably go to a different motor and battery pack, but since I plan on moving this to my T-Maxx I wont do that for now. One last note the nice thing about this design is if you only have one Maxx you don't always have to leave it a 6WD. It converts back to stock very easily. Remove the rear axle, skid plate, driveline and install your stock skid and you are back to a 4WD Maxx. |